Create and use Asana workflows
- Skip Ahead to
- Setting up a workflow
- Intake of work
- Prioritization of tasks
- Visible progress
- Choosing sections
Workflows connect the right people to the right information at the right time, but how does a team actually implement a workflow?
Starting from scratch, we’ll show the fundamentals of creating and implementing a workflow with a specific example. We’ll focus on a Design team who want to streamline their work by taking messy requests from other teams and funneling those tasks to the relevant assignees automatically. Work will move through various stages, getting assigned to the right party and picking up relevant collaborators on the way - and best of all, the Workflow Builder will set this up so that there is minimal manual input.
Still need to sign up for a free trial? Choose Premium or Business and test out the Workflow Builder. Get started
Setting up a workflow
In our example, the Design team has decided it’s time to streamline how they take in requests, and how work gets assigned to the right people at the right time. To do this, they’ll use the Workflow Builder feature. You can use the Workflow Builder in any existing project, or set it up while you create a new project.
Alan from the Design team is setting up a new project for the creative requests his team receives. He adds the project’s name, decides on the project’s privacy settings, and then chooses Set up workflow when asked how he would like to begin.
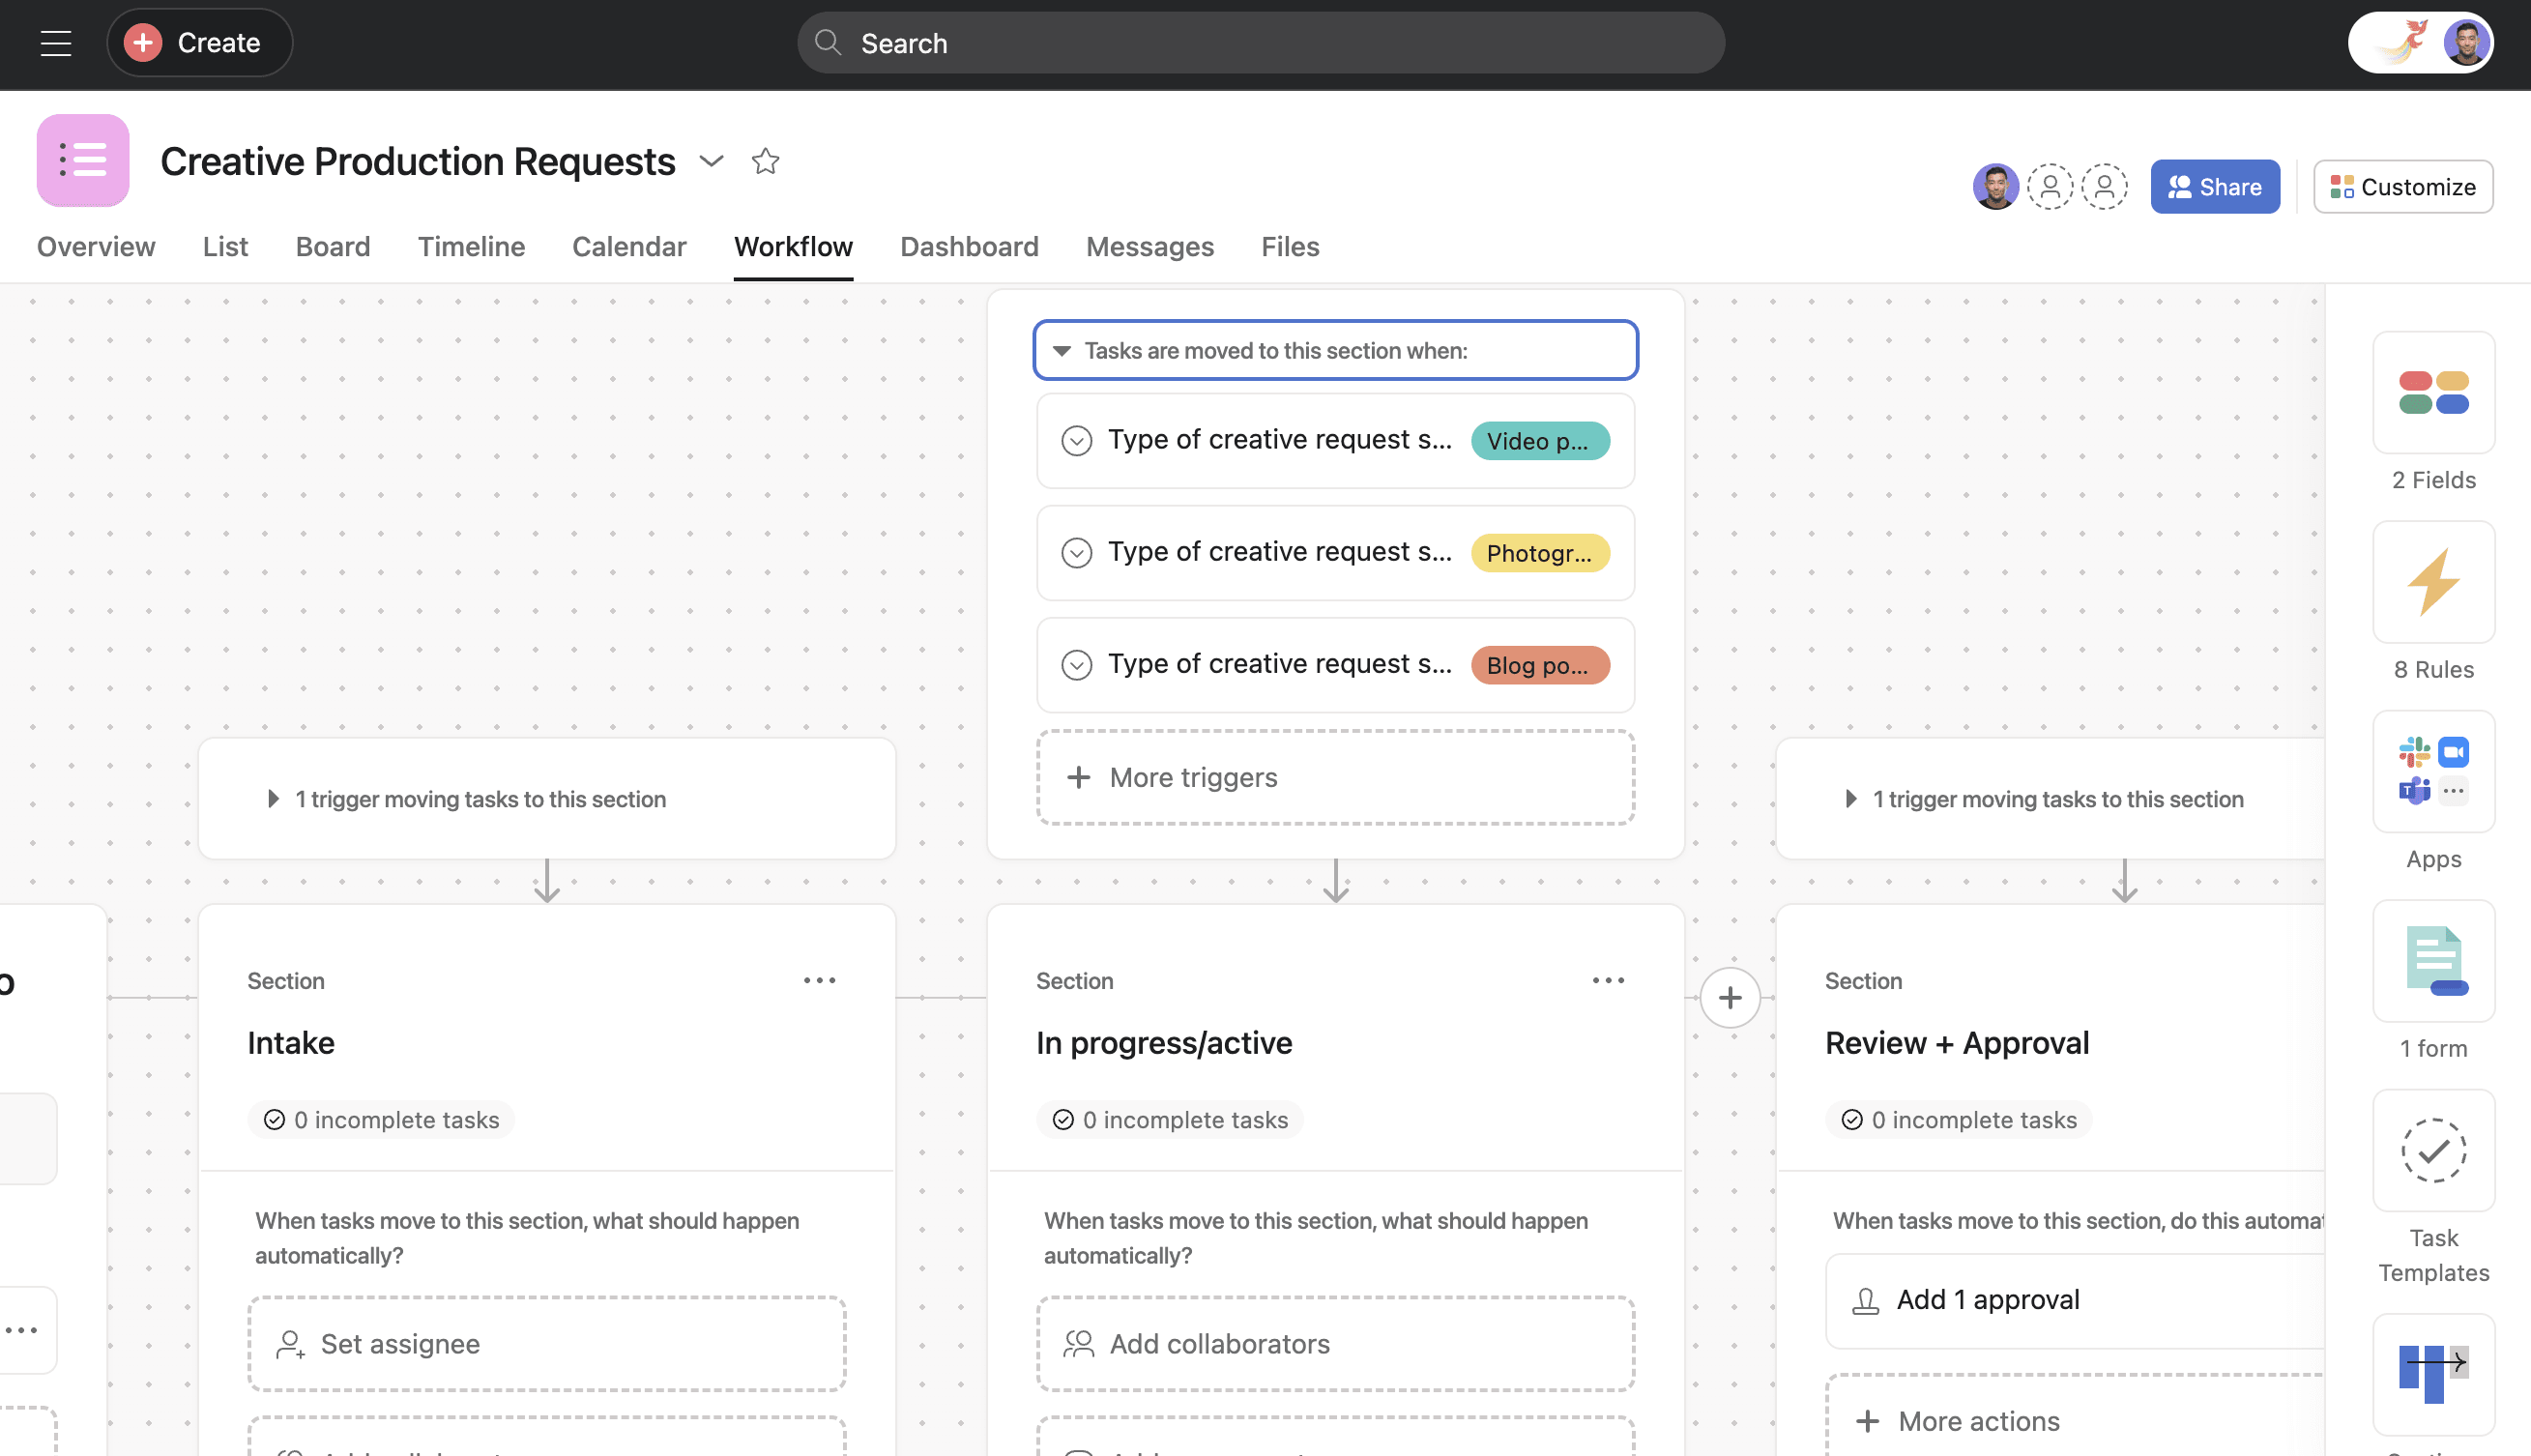
Alan is prompted with the question What are the stages or sections of your project? He decides on a few sections that his team’s work will move through. He chooses Intake, In progress/active, Review + Approval, and finally Complete.
We'll talk more about why Alan chose these sections a little later - but you can skip to that part by clicking here if you wish.
Right away, Workflow Builder asks Alan How are tasks being added to this project? This kind of project will be used to take in requests from other teams, and there are a few options, but Alan wants people to fill out a form when they are requesting something from his team. This way, he can make sure that his team have all the information they need to get started on a request. Alan chooses Form submissions. In a different kind of project he might choose a different intake source.
Note that Alan doesn’t need to have already created his form, Workflow Builder allows him to create it there and then, without having to navigate away. A form is ideal for Alan, because he’s planning to use custom fields and rules to delegate the different types of requests amongst his team. When a request for photography comes in, the requester selects Photography from the form question. Once the form is filled out a task is created, and the custom field Request type automatically reads Photography, and the rule can kick in at that point.
In a similar way, Alan doesn’t need to make sure he’s already created the Request type custom field before he begins to use the Workflow Builder or create his form. He can do this while he builds out his form, so he never has to break his flow. When the form is ready, Alan is confident that photography, video production, and creative copy requests will go to the right people every time - all without him needing to manually assign any tasks. That’s a major benefit of forms branching logic, available with an Asana Business subscription.
While this automated process no doubt saves a lot of time, there may be occasions when colleagues do need to discuss things before kicking off a request, so Alan has made sure to include an I don’t know, let’s talk! option, which will assign the task directly to him. He can discuss the request with the form submitter, and can triage the task when he has all the context he needs. Sometimes there will be requests which don’t quite fit the mold, and will require a little discussion before work begins, so this can be a useful option in Alan's case.
Intake of work
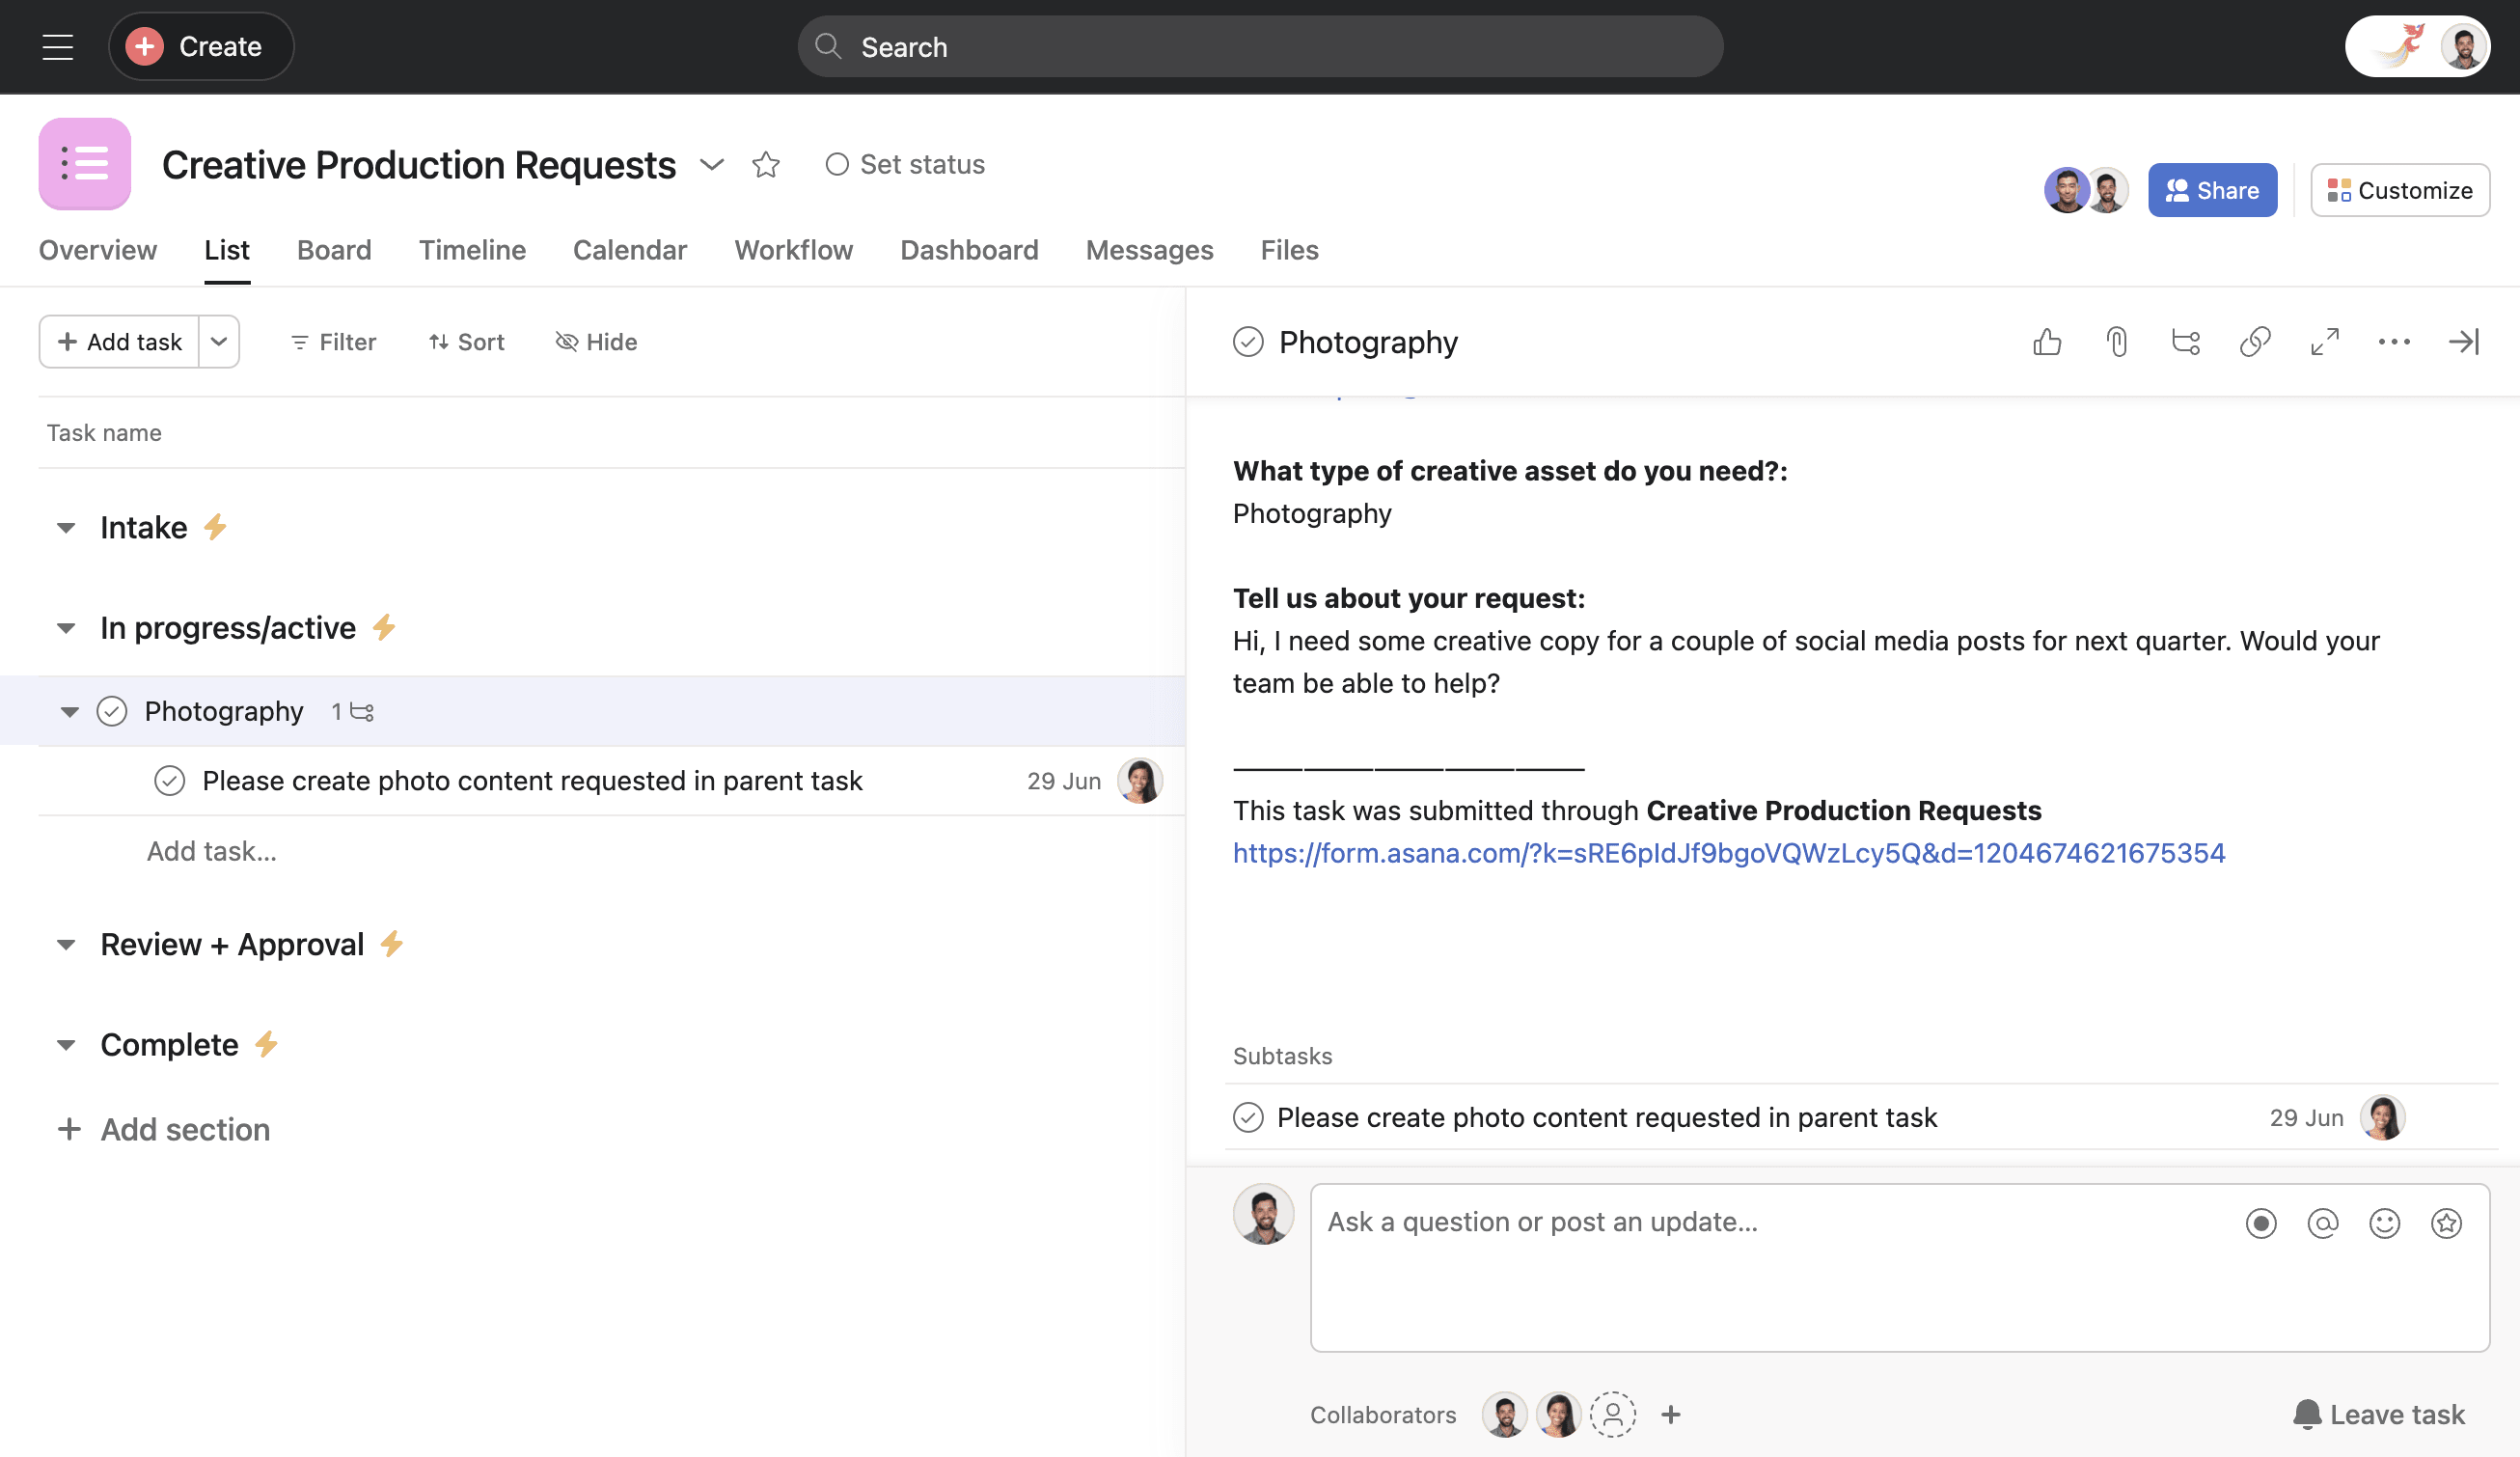
When the form submitter fills out the form, a task is created in the Creative Production Requests project, and includes all the information that Alan’s team might need to complete their work. As mentioned earlier, the form submission’s task receives the relevant custom field values based on Alan’s questions - photography requests receive the custom field value Photography.
Prioritization of tasks
Alan has also created a rule which is set to be triggered when the custom field value of Photography is set. The action performed by this rule is to create a subtask assigned to Jamie, who handles photography requests for the team. Jamie has a 3-week lead time for these kinds of requests, and Alan’s rule respects that, setting the due date for 21 days in the future.
Any screenshots, images, or other files that Jamie might need can added to the form submission by the submitter as they fill the form out. Jamie can therefore concentrate on her focussed work without needing to waste time going back and forth with the submitter - though she always has that option, since the submitter is automatically added as a collaborator, they receive updates on the task’s progress through their inbox, and both the submitter and Jamie can discuss the work in the comments if they need to.
Once Jamie has provided the image, she manipulates a custom field with a couple of clicks, and the Legal team is brought in via a subtask to review the asset.
Visible progress
Again, Jamie doesn’t need to assign any work or create any tasks manually, since Alan used the Workflow Builder to create an approval subtask for Sophie on the Legal team whenever the custom field Legal review is set to Ready for Legal review. Sophie therefore doesn’t need to be involved in the 3-week photography production process until the moment her expertise is needed. The subtask is given a due date 7 days in the future, automatically of course.
In a similar way, Sophie completes her subtask and sets the Legal review value to Legal review complete. Even though the task is about 1 month old at this point and has been through the hands of a number of people, from Sophie’s point of view, she only needs to focus on her approval subtask, and approve, reject, or request changes.
Assume the asset is ready to go and Sophie approves it from a legal standpoint. Alan has set a rule using the Workflow Builder to complete the parent task, move it to the Complete section, assign it to the submitter, and inform them via a rule (using variables in rules so the assignee is always correct and automatic).
The work is done, the requester is informed, and Alan has coreographed a request for a creative asset without ever needing to manually assign or create any task, beyond his work setting up his project with Workflow Builder at the start.
If you'd like to see some further detail on how Alan set up his project sections, keep reading.
Choosing sections
Alan is prompted with the question What are the stages or sections of your project? He decides on a few sections that his team’s work will move through. He chooses Intake, In progress/active, Review + Approval, and finally Complete.
Here’s why Alan chose these sections.
Intake:
Even though he’s using the Workflow Builder to automate how his team’s work gets assigned, Alan wants a section at the top of his project’s list view where colleagues can manually add tasks so they can discuss the work in detail, without triggering any rules. Since anyone with access to the project can manually add a task, he can be sure that the work won’t be automatically assigned before it is 100% ready.

This section is also designed to receive any form submission in which the requester has selected I don’t know, let’s talk! when asked what kind of creative asset they require. Again, it's just a section to catch awkward tasks so they can be discussed first and assigned manually.
In progress/active:
This section will hold all the work that is currently being undertaken by Alan’s team, so the team can have a good overview of the work being done. If the task in this section, it’s still being worked on, and Alan or his colleagues can view the subtasks or custom field values on the task to get a good sense of how the task is progressing.
Creative requests that enter the project through the Creative Requests form initially end up here, and trigger rules that Alan has set up with the Workflow Builder. Depending on the selections made by the form submitter, various subtasks with specific assignees and custom field values will be added, all decided in advance.
Alan's team know that they don't need to look at any other section in the project apart from In progress/active. If a task is still in the Intake section, Alan is handling it. If a task is in the Review + Approval section, the work is done and the asset is in the hands of the Legal team now.
Review + Approval:
Once Alan’s team has completed the creative request, it’s time for the asset to be reviewed.
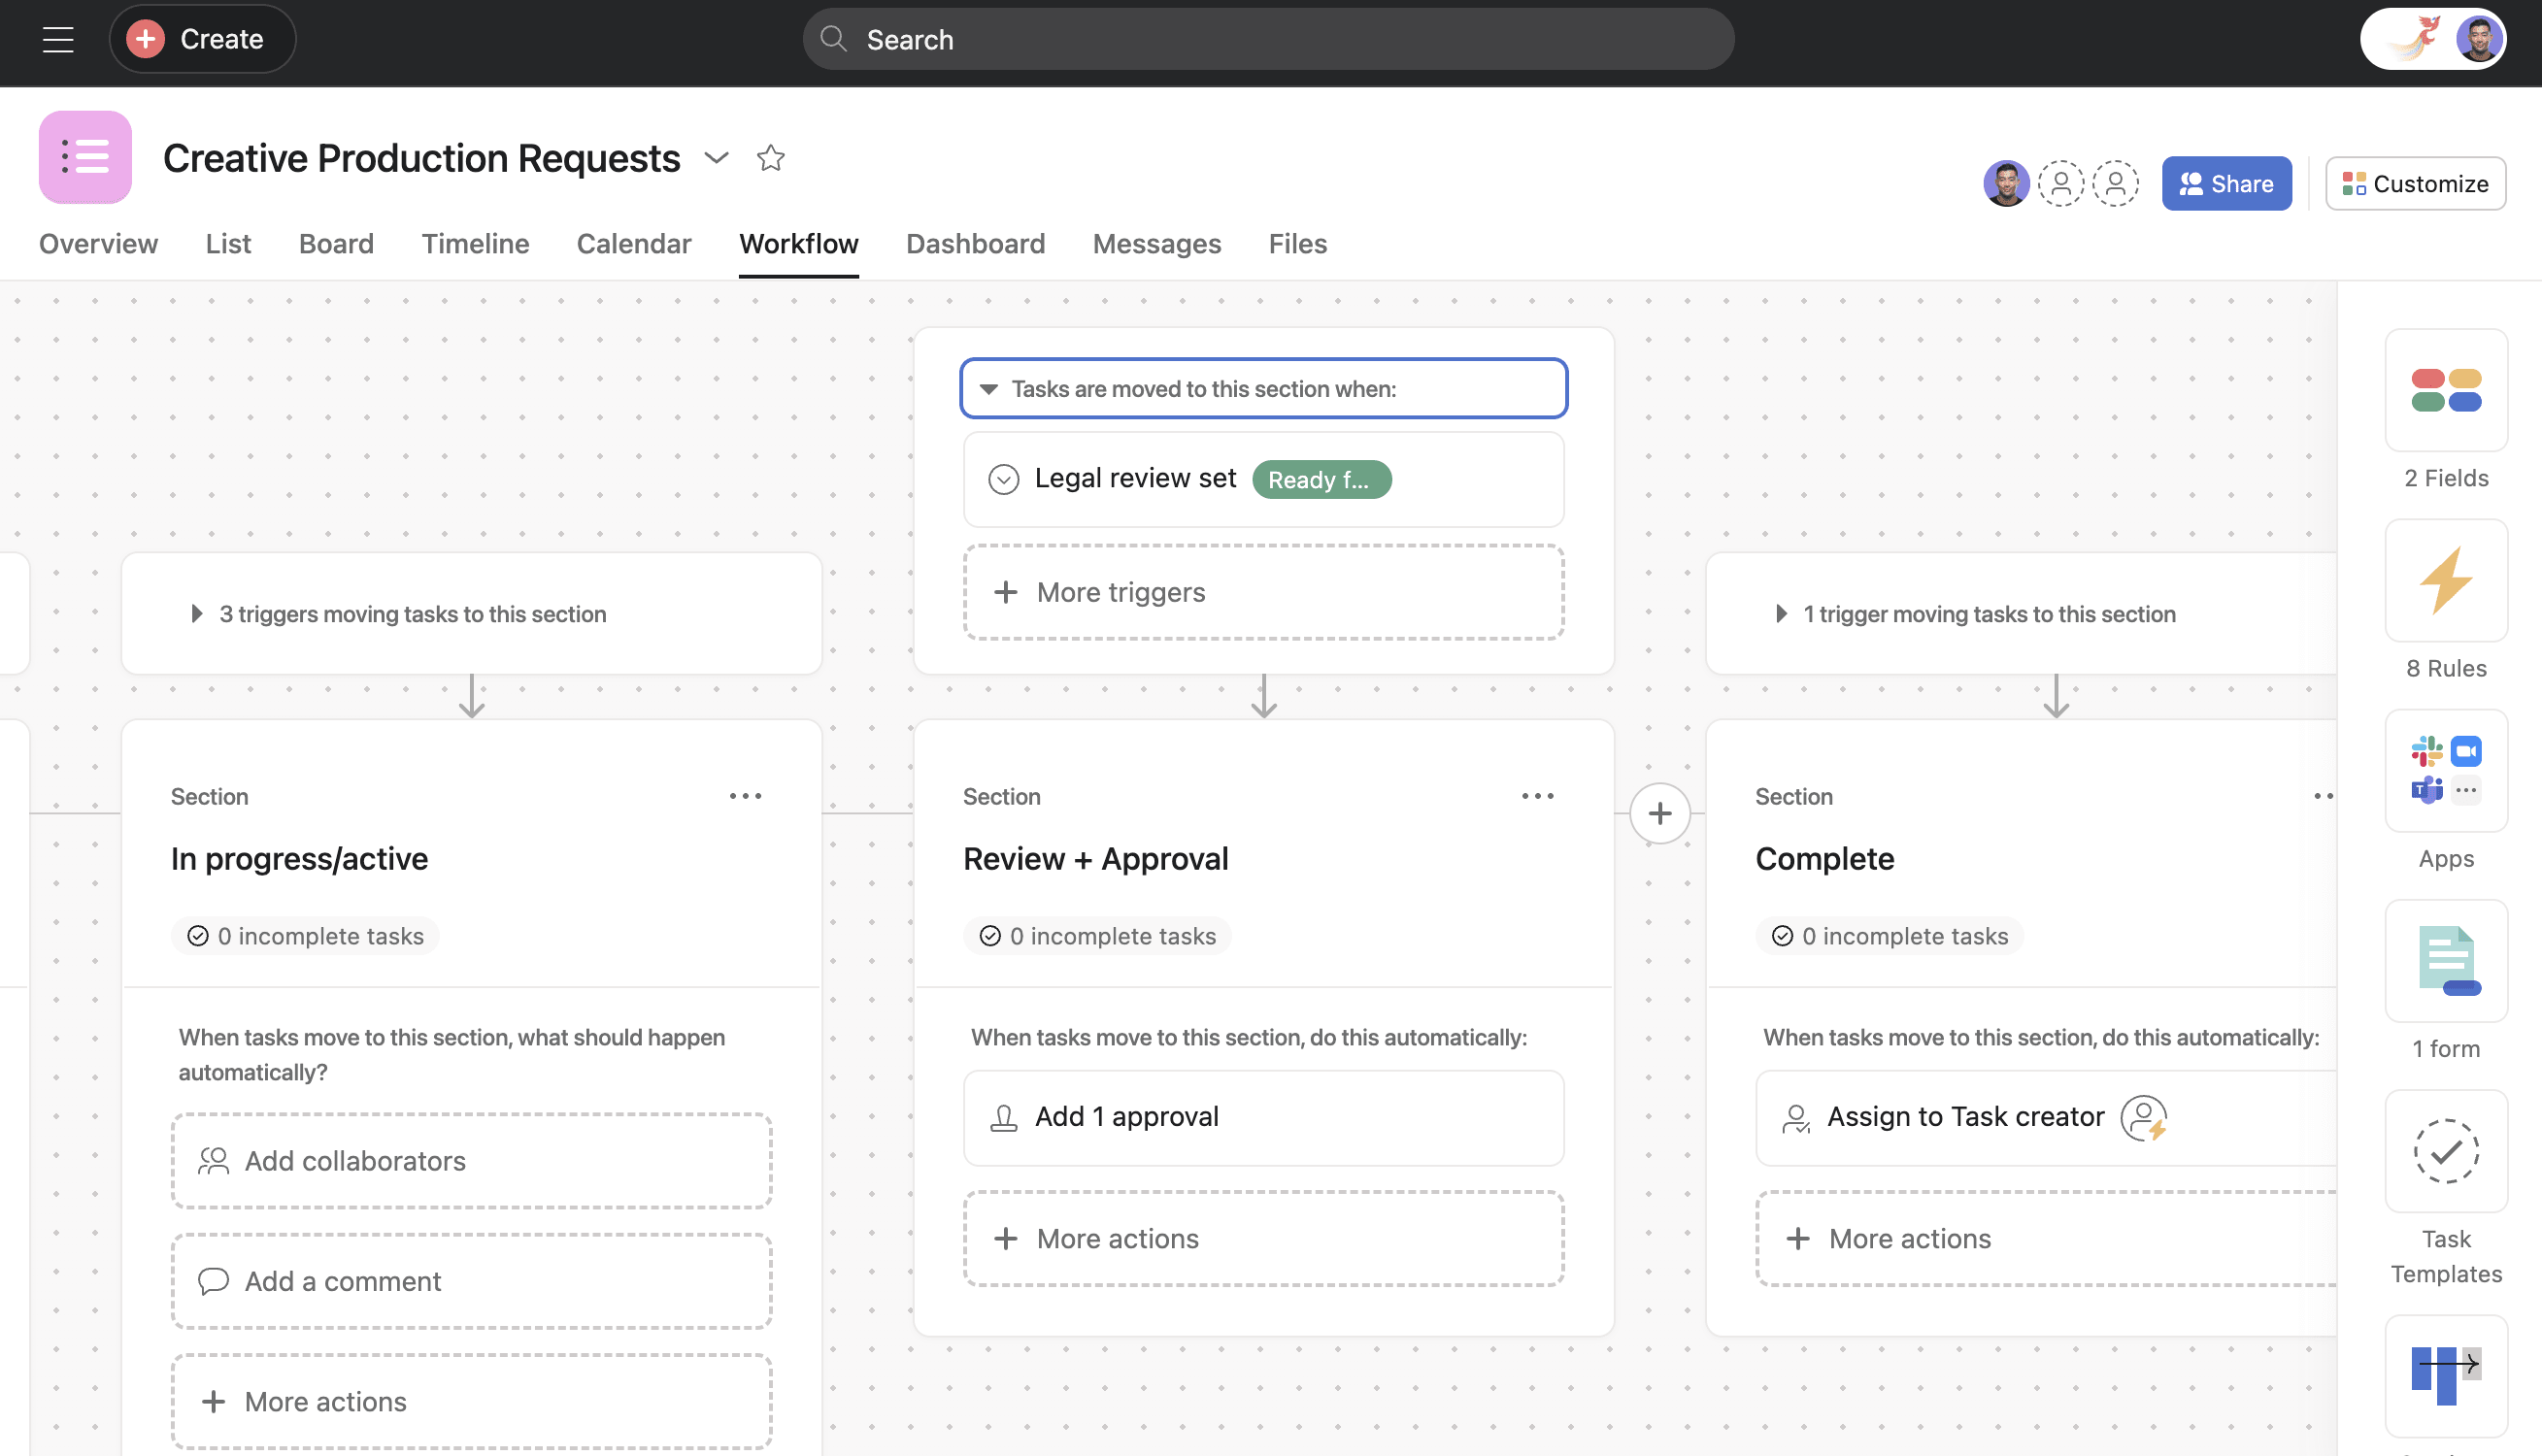
In this case, the team always get approval from Sophie on the Legal team, and Alan has set up a rule so that Sophie will receive an approval subtask as soon as the asset is ready. Sophie just needs to change one custom field value, and the task moves to the next stage.
Complete:
While some projects need their completed tasks to disappear, Alan and his team prefer to keep their completed tasks visible as standard. He has set up a rule which automatically moves completed tasks into the Complete section. If the section gets too big, he collapses the section so his project is kept tidy, and he can expand it any time he needs to.
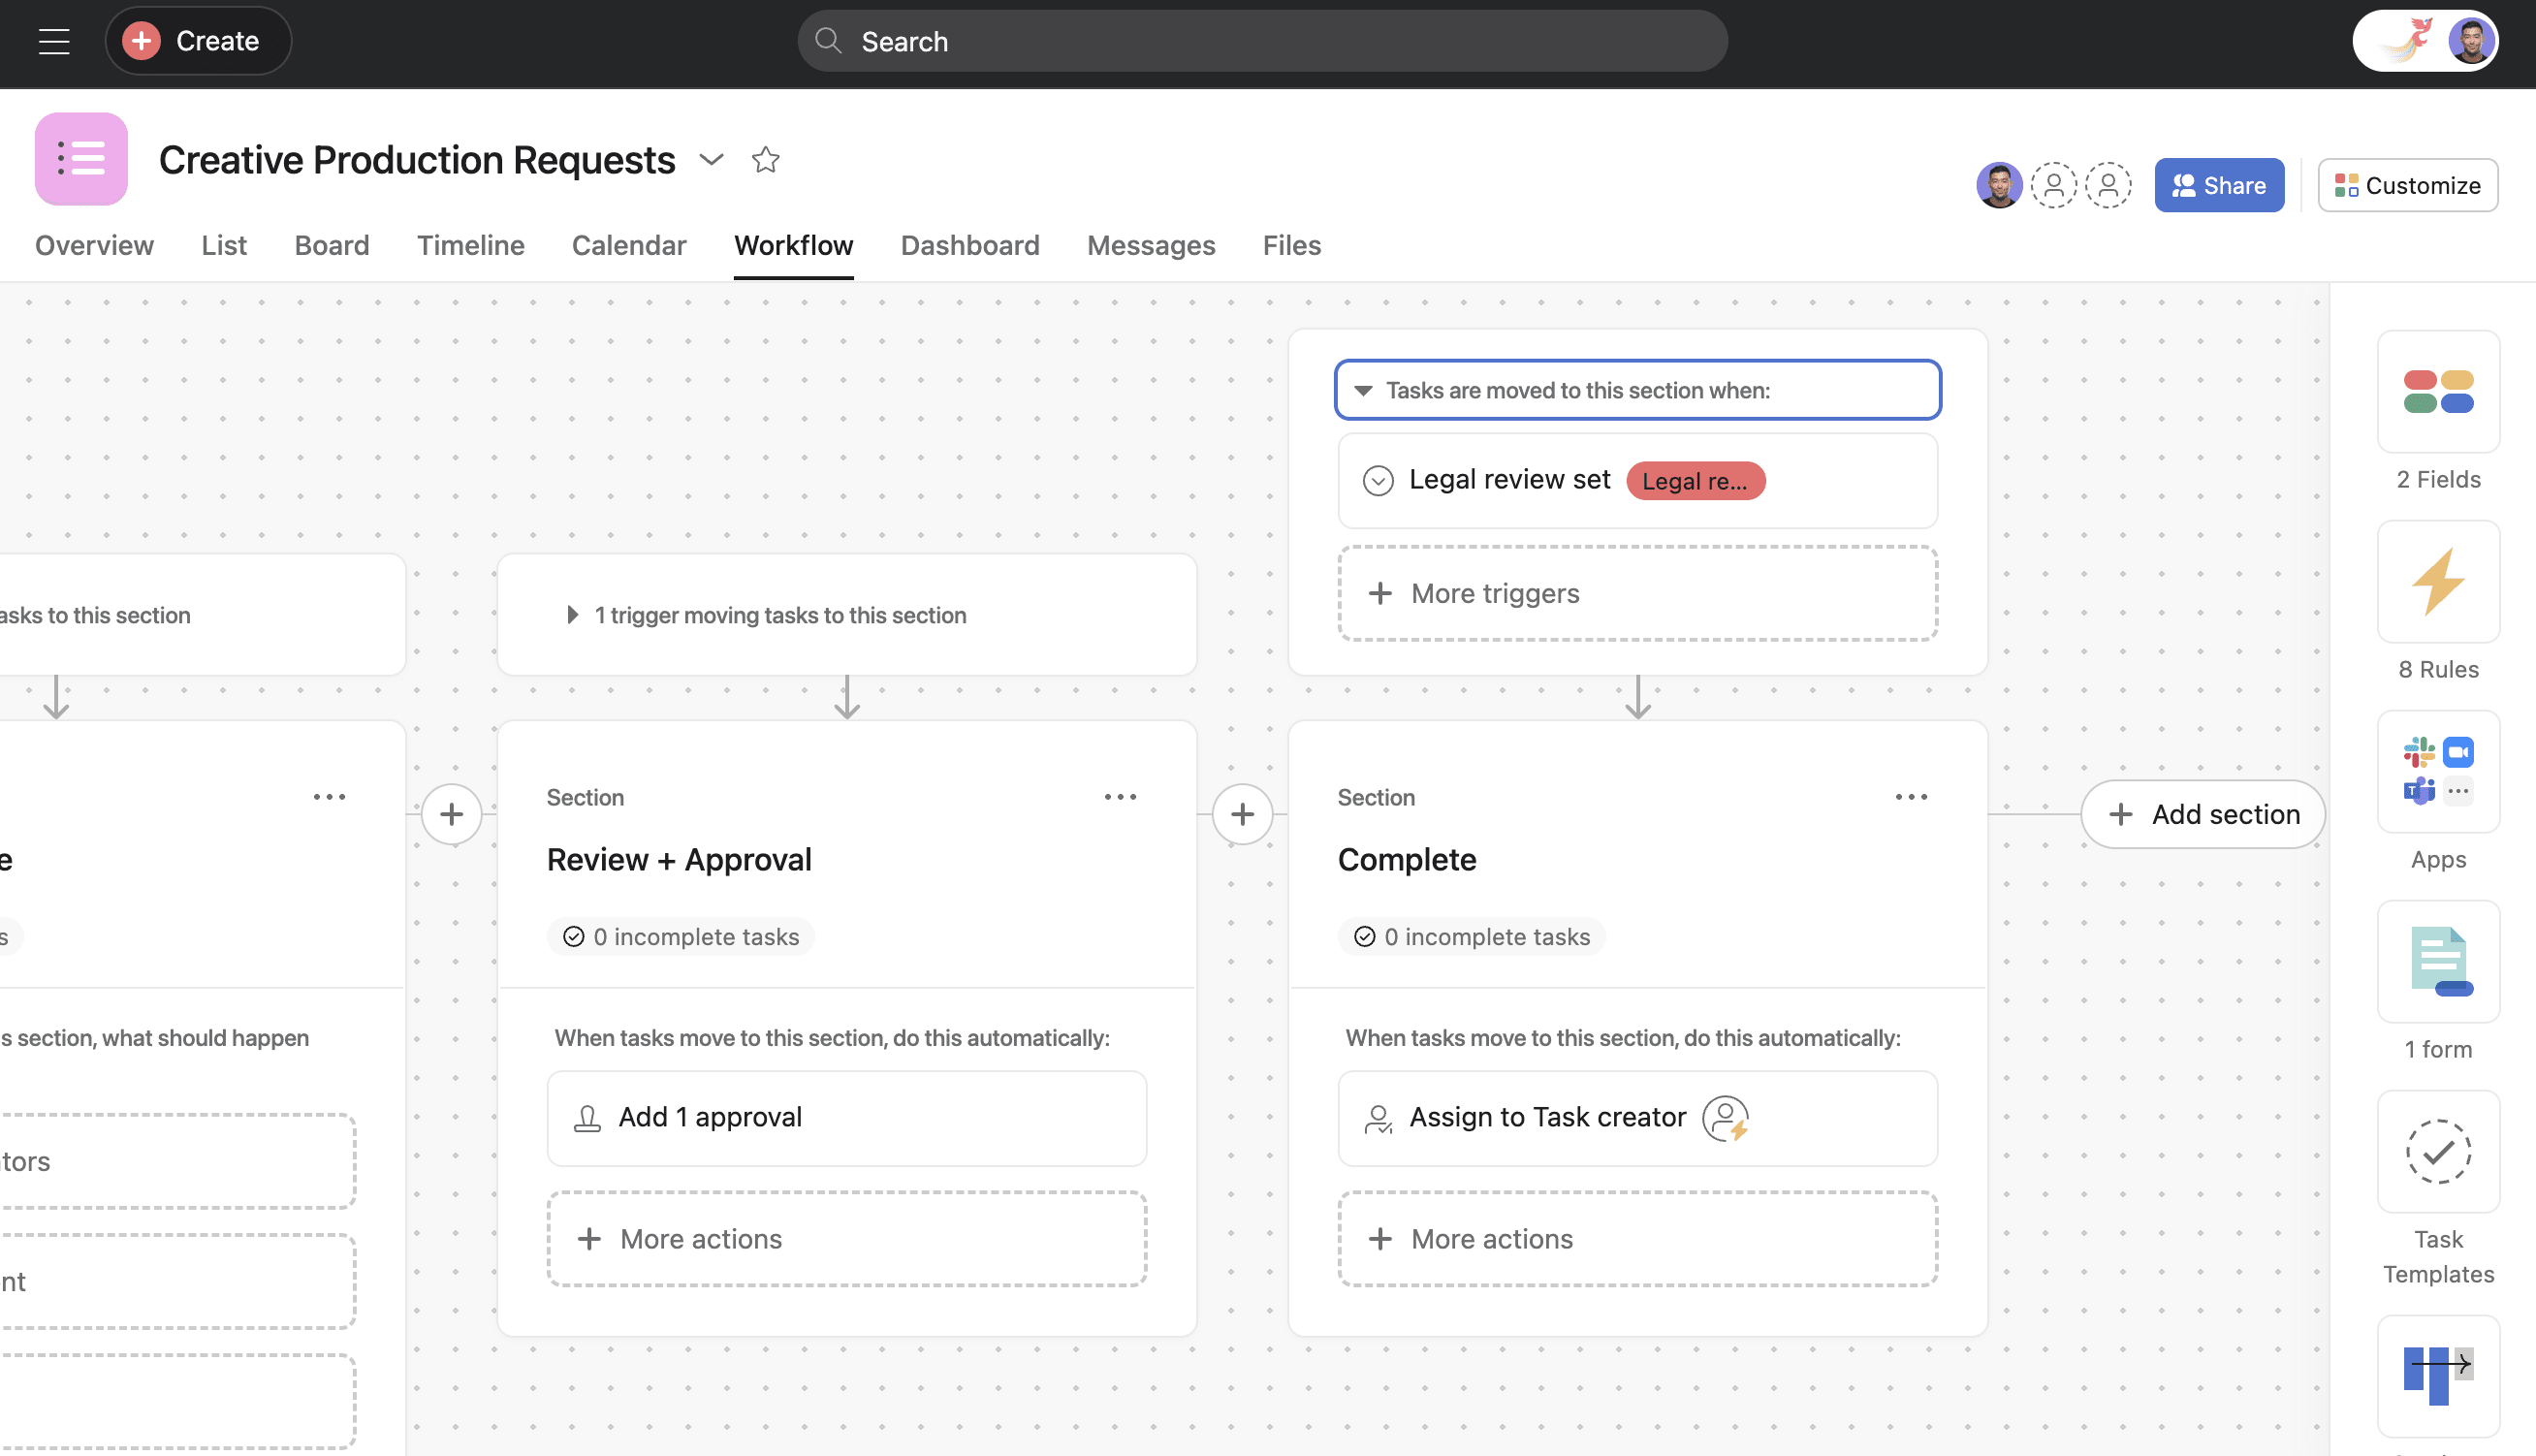
Alan's rule also assigns the task back to the task creator, who is always the person who requested the asset. He uses variables in rules to achieve this without any manual input.

