Что такое разработка проекта? 7 шагов с советами экспертов

Сводная информация
Когда дело доходит до управления проектами, бывает трудно привести всех к единому мнению. Когда в проекте много подвижных элементов, несколько результатов и несколько отделов, одного стартового совещания может быть недостаточно.
Концепция проекта — это возможность согласовать идеи, процессы и ожидаемые результаты. Это ранняя фаза жизненного цикла проекта, которая часто предшествует составлению плана или устава проекта. Это связано с тем, что на этом этапе основное внимание уделяется обзору проекта, а не конкретным деталям. На этом раннем этапе для наглядного представления информации заинтересованным лицам часто используются такие визуальные средства, как блок-схемы, диаграммы Ганта и хронологии.
Мы рассмотрим основы разработки проекта, изложим семь этапов его создания и предоставим советы экспертов, которые помогут вам лучше понять этот процесс.
Как устроена концепция проекта
Концепция проекта — это ранний этап жизненного цикла проекта, на котором планируются идеи, процессы, ресурсы и ожидаемые результаты. Разработка дизайна проекта предшествует составлению плана проекта, поскольку это общий обзор, в то время как план проекта включает более подробную информацию.
При создании дизайна проекта необходимо выполнить семь действий, включая определение целей и использование наглядных средств для их представления.

В качестве визуальных элементов используются диаграммы Ганта, канбан-доски и блок-схемы. Наглядное представление стратегии проекта поможет создать прозрачность между заинтересованными сторонами и прояснить различные аспекты проекта, включая его общую осуществимость.
Попробовать Asana для управления проектамиСемь шагов разработки проекта
Успешный процесс разработки проекта состоит из семи этапов. Они включают в себя всё: от определения целей и базовых задач до укрепления стратегии, которая поможет вам оставаться организованным при управлении новым проектом.
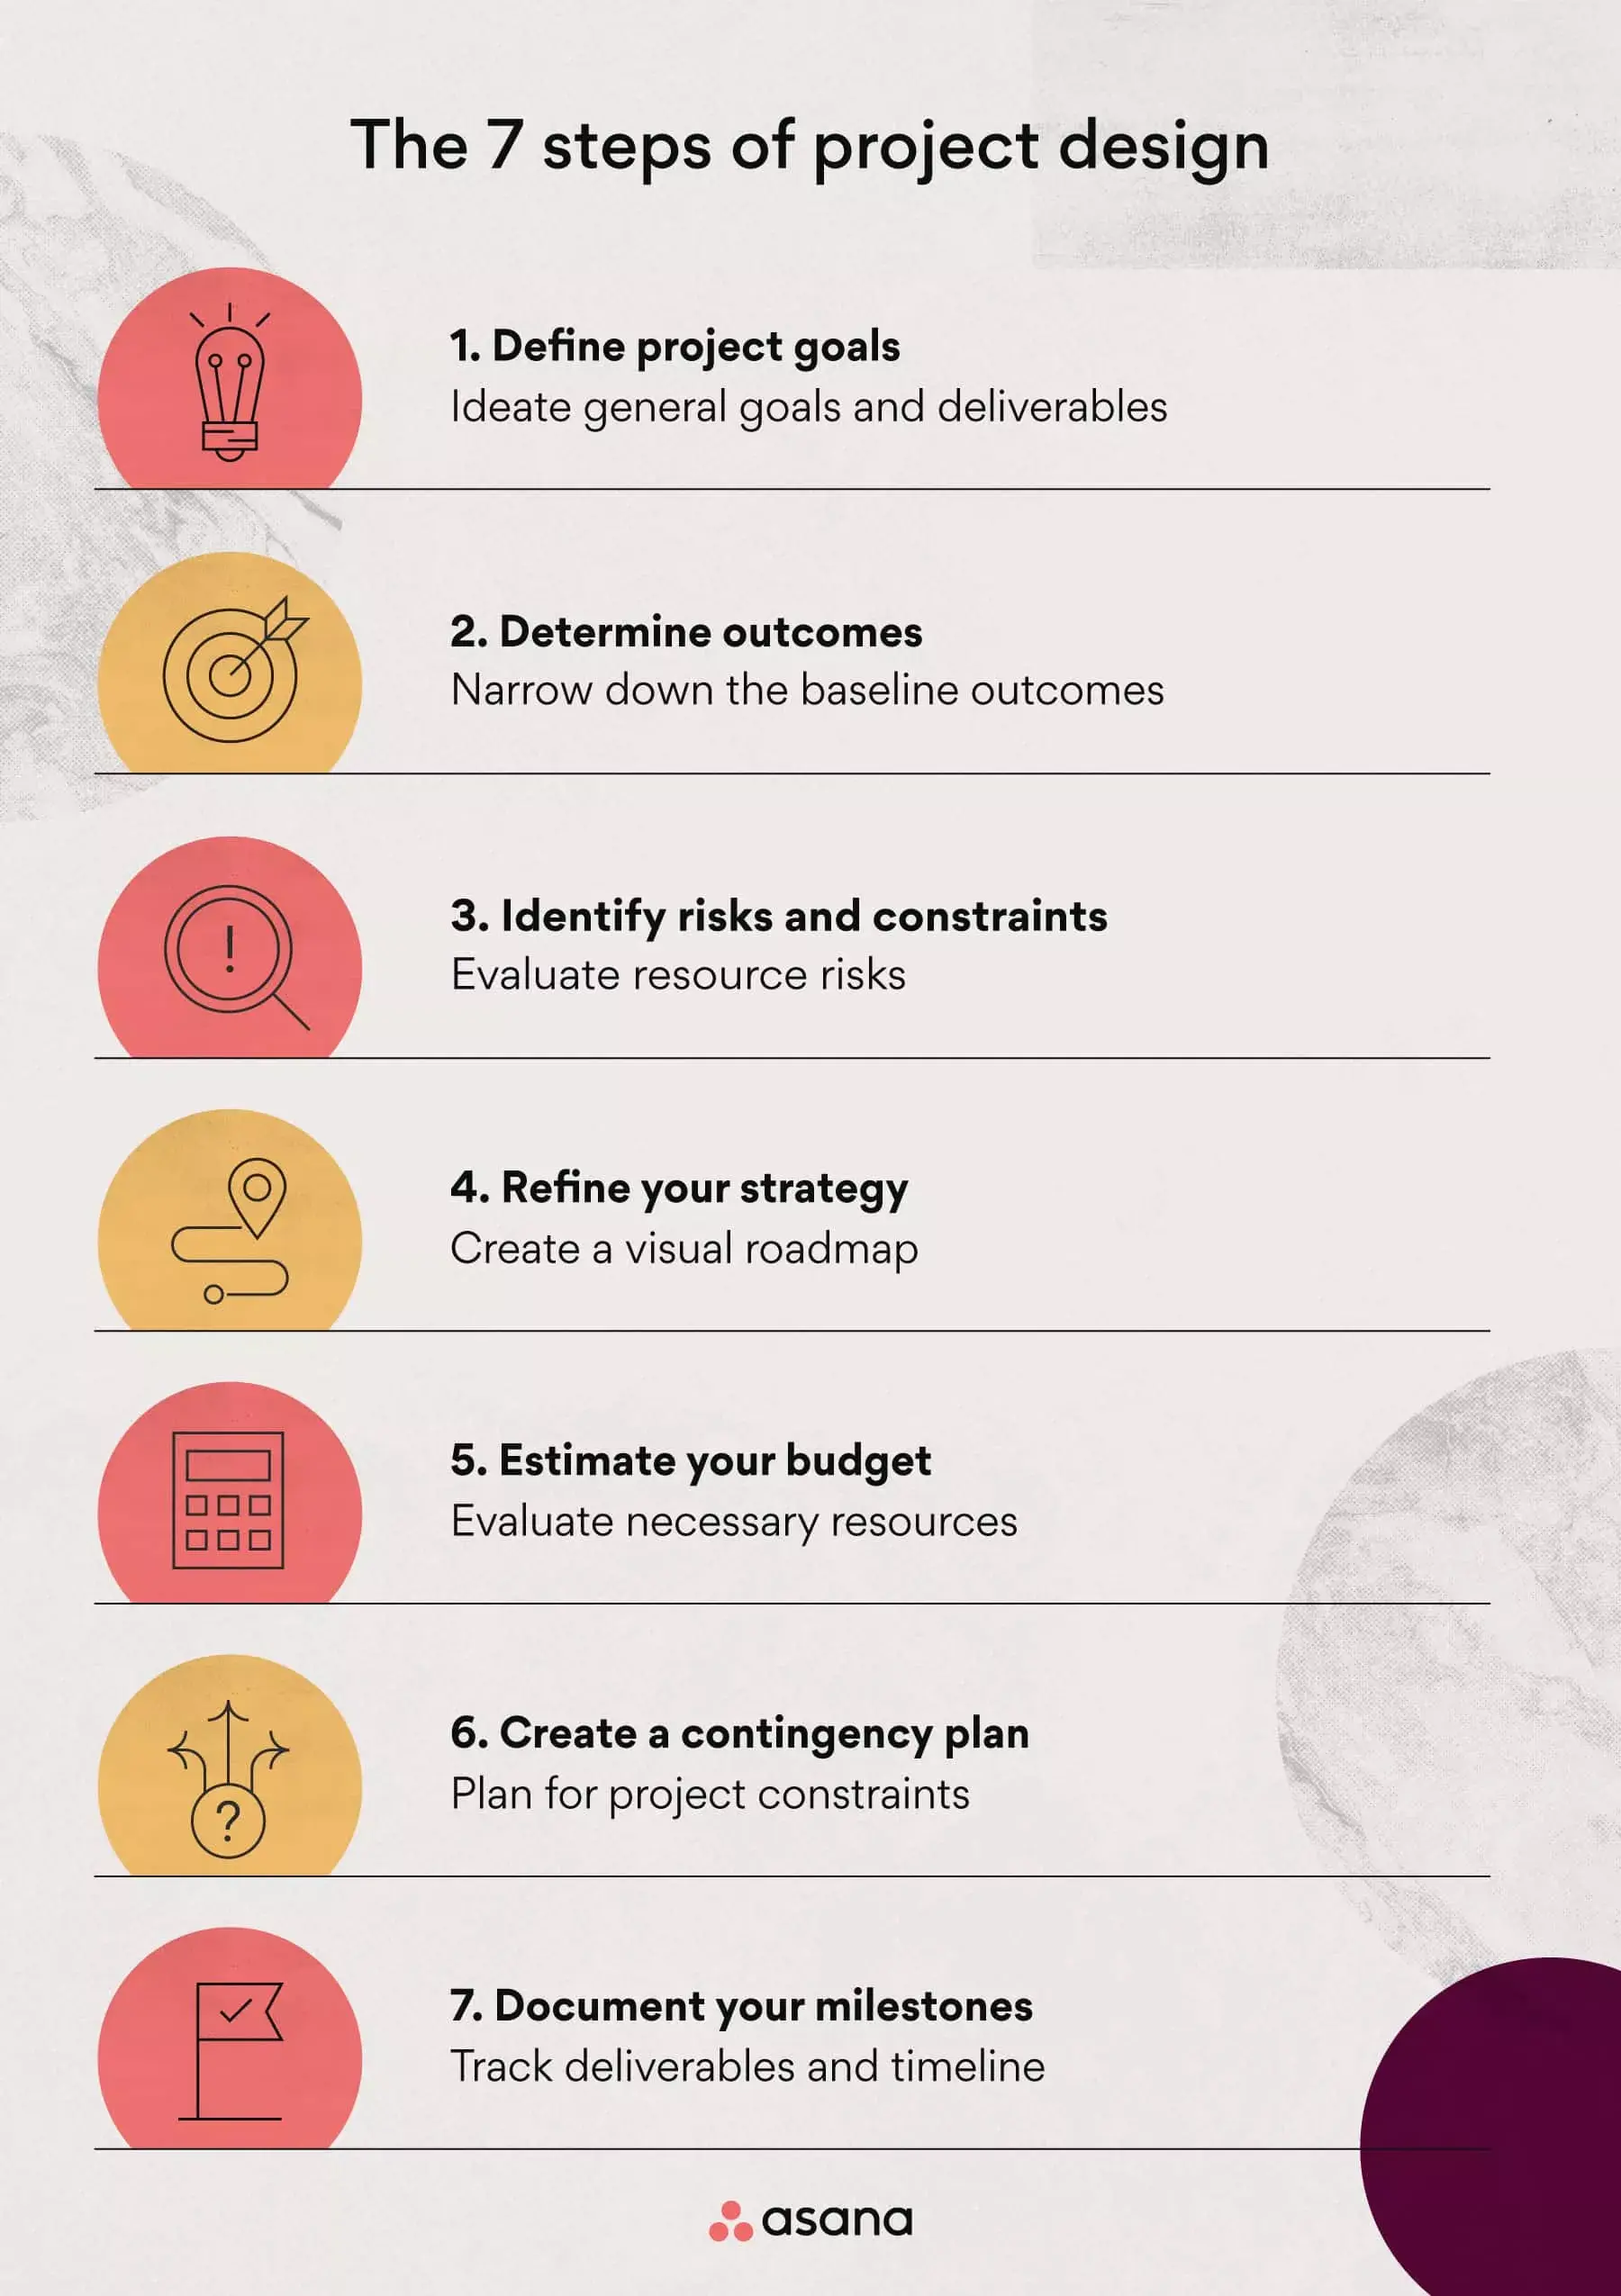
Рассмотрим каждый из этапов, необходимых для разработки дизайна проекта.
Шаг 1. Определите цели проекта
На первом этапе определите цели проекта. Для начала проведите первоначальное совещание по формированию идей, на котором вы задокументируете общий график проекта и ожидаемые результаты.
Для начала рассмотрите потребности проекта и заинтересованных сторон. Какую проблему вы пытаетесь решить? Начните с краткого описания проекта и его участников.
После того как вы определили основные цели проекта, перейдите к более конкретным деталям.
Совет: используйте SMART-цели при разработке проекта, чтобы лучше визуализировать, куда вы движетесь. SMART — это аббревиатура, которая расшифровывается как конкретные (specific), измеримые (measurable), достижимые (achievable), реалистичные (realistic) и ограниченные по времени (time-bound).
Читать статью «Как создать эффективную цель проекта (с примерами)»Шаг 2. Определите результаты
Затем сузьте круг результатов проекта. Обычно они более детализированы, чем первоначальный этап планирования целей, и включают конкретные задачи, которые вы будете выполнять в ходе проекта.
Представьте, что вы работаете над проектом по добавлению новой целевой страницы на свой сайт. Одним из результатов может быть добавление формы регистрации по электронной почте.
Задокументируйте результаты и основные итоги, необходимые для достижения целей проекта, чтобы начать планирование сроков. Неплохо бы также вспомнить про популярные методологии управления проектами, чтобы решить, какая из них лучше всего подходит для вашего проекта.
Совет: для сложных проектов используйте методологию Agile с итерациями, чтобы разбивать большие задачи на короткие спринты. Для более традиционных проектов используйте каскадную модель, которая обеспечивает тщательный пошаговый подход.
Попробовать Asana для управления проектамиШаг 3. Выявление рисков и ограничений
Определив результаты, рассмотрите риски и ограничения проекта. Оцените аспекты проекта, которые могут привести к риску, чтобы предотвратить потерю ресурсов в будущем.
Для выявления рисков и ограничений определите необходимые инструменты управления ресурсами, средства и сроки. Постарайтесь устранить эти ограничения до начала проекта, связавшись с соответствующими заинтересованными сторонами и командами проекта.
Совет: используйте реестр рисков для анализа, документирования и устранения возникающих рисков.
Шаг 4. Уточните стратегию проекта с помощью наглядных средств
Стратегия проекта — это наглядная дорожная карта проекта. Она помогает донести цель до участников команды. Создайте свою стратегию, выбрав наглядное пособие, которым можно поделиться с заинтересованными сторонами.
Существует множество типов визуальных средств, среди которых:
Блок-схема: это наглядное представление шагов и решений, необходимых для выполнения процесса. Блок-схемы особенно полезны для визуализации пошаговых подходов и эффективной организации результатов проекта.
Диаграмма Ганта: это горизонтальная столбчатая диаграмма, которая иллюстрирует хронологию проекта. Столбцы на диаграмме Ганта представляют собой этапы проекта, а их длина обозначает количество времени, необходимое для их завершения.
Иерархическая структура работ (WBS): это разбивка всех задач в рамках проекта. С помощью иерархической структуры работ менеджеры проектов помогают командам наглядно представлять ожидаемые результаты, не забывая о целях.
Ассоциативная карта: это иерархическая диаграмма, используемая для визуализации проектов и задач. Она позволяет менеджерам проектов связывать результаты с центральной концепцией или идеей, например с конкретной целью команды.
Диаграмма PERT: инструмент, который используется для планирования, организации и распределения задач. Она может быть полезна для сложных проектов и для оценки времени, необходимого для выполнения задач.
Поскольку все визуальные инструменты немного отличаются друг от друга, выбор зависит от предпочтений вашей команды. В то время как иерархическая структура работ, детализирующая зависимости, хорошо подходит для больших команд, блок-схема лучше подходит для небольших команд с менее сложными проектами.
Совет. Изучите особенности компонентов каждого из визуальных инструментов, прежде чем добавлять их в дизайн проекта. Для этого проанализируйте каждое из них с точки зрения количества деталей, удобства использования и внешнего вида. Так вы сможете подобрать наиболее подходящий вариант.
Шаг 5. Оценка бюджета
Затем оцените бюджет проекта, чтобы начать распределение ресурсов. Ваш бюджет будет включать рентабельность проекта, доступные ресурсы и необходимую работу на аутсорсинге. Это также может быть заданное руководством число, которое вам нужно будет учитывать, чтобы иметь возможность выполнить каждый результат.
Возможно, ваш бюджет потребуется согласовать или пересмотреть на основании решения руководства. После этого можно приступать к назначению бенефициаров, разработке документов и задач по проекту. Для сложных проектов команда часто использует шаблон проектного документа, чтобы зафиксировать технические требования, зависимости и спецификации вместе с бюджетом.
Совет. Когда дело доходит до распределения ресурсов, внедрение автоматизированных процессов с помощью программного обеспечения для автоматизации может повысить эффективность и снизить количество ошибок в проекте.
Шаг 6. Создайте план действий в непредвиденных обстоятельствах
Прежде чем назначать задачи, создайте план действий в непредвиденных обстоятельствах. Это резервный план на случай рисков и ограничений, описанных ранее в процессе. Наличие организованного плана при возникновении проблем помогает решать их в режиме реального времени и повышать эффективность.
Чтобы создать такой план, упорядочите риски с помощью диаграммы Ганта или инструмента для создания хронологии и определите план для каждого риска. Например, если один из рисков связан с несвоевременным поступлением материалов, ваш план действий может заключаться в том, чтобы получить материалы из другого места или начать другую часть проекта в ожидании материалов.
После того как вы составите план для каждого риска, можно приступать к реализации проекта.
Совет: используйте Asana для просмотра списков, хронологий и диаграмм Ганта, чтобы лучше визуализировать план проекта.
Шаг 7. Задокументируйте важные этапы
На последнем этапе задокументируйте важные этапы своей команды. Это делается для того, чтобы работа была завершенной вовремя и чтобы можно было легко выявлять несоответствия по мере их возникновения.
Для этого можно использовать программное обеспечение для управления проектами, где заинтересованные стороны могут получить доступ к информации и прогрессу. Рекомендуется управлять этими важными этапами до конца проекта, чтобы обеспечить своевременное выполнение задач.
Совет: регулярно связывайтесь с заинтересованными лицами проекта, чтобы отслеживать зависимости между задачами и обеспечивать достижение краткосрочных целей.
3 совета экспертов по улучшению разработки проекта
Создать дизайн проекта, который улучшает совместную работу и повышает эффективность, — непростая задача. Наряду с семью этапами, из которых состоит процесс разработки проекта, вот несколько советов, которые помогут вам сделать ещё один шаг вперёд.
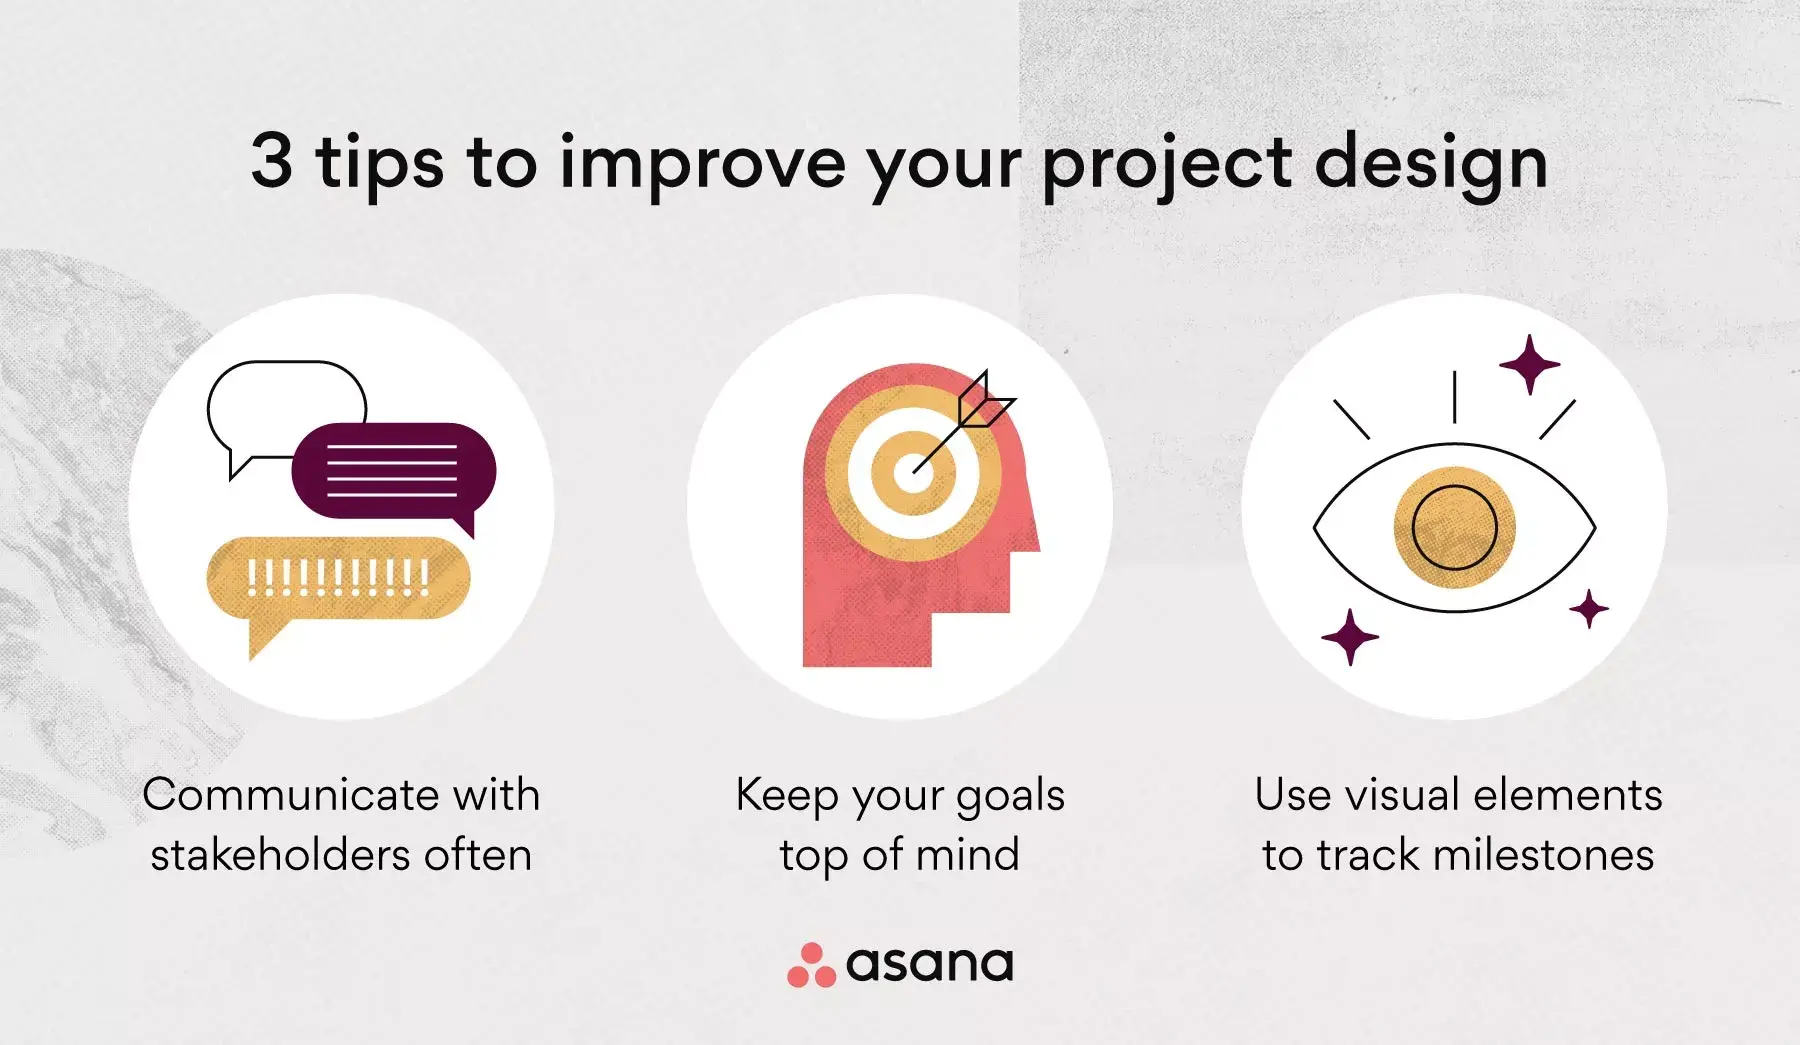
При разработке собственного проекта учитывайте эти три совета:
Общайтесь с заинтересованными сторонами на раннем этапе и как можно чаще: общение является ключевым фактором независимо от проекта, над которым вы работаете. Сотрудничество на раннем этапе проекта может обеспечить единое понимание ситуации и наиболее важных целей всеми заинтересованными сторонами. Для этого можно проводить совещания на протяжении всего проекта и использовать рабочие процессы для оптимизации командной работы.
Не забывайте о целях: привязка целей к результатам проекта обеспечит их достижение на каждом этапе. Это можно сделать с помощью программного обеспечения для составления хронологии, в котором можно легко связать цели с работой, необходимой для их достижения.
Используйте визуальные элементы для отслеживания важных этапов: хотя бизнес-кейс и ежедневные задачи полезны, визуальные элементы помогают заинтересованным сторонам видеть общую картину. Существует ряд способов визуализации работы над проектом: от диаграмм Ганта до диаграмм PERT.
Помимо этих трех советов, всегда помните об интересах своей команды. Предоставление необходимой информации и планирование работы в разумные сроки обеспечит вовлечённость и эффективность вашей команды.
Используйте дизайн проекта, чтобы рассказать историю
Дизайн проекта — важная часть его успешной реализации. Ваша задача — оживить детали, начиная от сбора необходимой информации и ресурсов и заканчивая координацией действий с командой. При правильном дизайне проекта вы и ваша команда сможете справиться с любыми задачами.
Выведите искусство планирования проектов на новый уровень с помощью программного обеспечения для управления работой. Asana поможет вашей команде добиться большего с ясностью и уверенностью, начиная с оптимизации работы и заканчивая повышением прозрачности.
Попробовать Asana для управления проектами